
Malcolm’s Bathroom Reveal – The Power Of Pivoting, Intentional Design, And A DIY That Will Have You Digging Into Your Walls

When I was a kid, I ALWAYS felt pulled to check out the design of the restroom of whatever establishment my family happened to be visiting—from restaurants and coffee shops to hotels and stores. I adopted a mindset at a fairly young age that if a space had a thoughtfully designed bathroom, that the relevant establishment really had their sh** together. I understood—though subliminally at the time—that if someone displayed a significant amount of intentionality to what is [ironically] both a hugely personal and often-shared space, that props deserved to be given.
Things haven’t changed very much now that I’m in my 30s. The only difference now is that I’ve grown to understand these concepts a lot more deeply and mindfully, which makes me hyper-critical of the decisions I make when I’m designing a bathroom, and made designing my own bathroom both a thrilling and mildly nerve-wracking experience. I’m nothing if not a walking catch-22!
In my introductory post about this bathroom remodel, I talked about three main goals and very typical-for-me introspective thoughts surrounding the renovation: maintaining the character of the rest of the home, continuing to perpetuate therapeutic routines by way of the renovated space, and pivoting my renovation timeline to meet changing requirements (read: the immediate need to fix a leaky situation). However, this bathroom has become the culmination of several pretty significant pivots in my life that I wasn’t even fully aware of until this gem of a space was complete.
PIVOTING MINDSETS

Making the decision to completely overhaul this bathroom wasn’t an easy one. While I was lucky enough to have the budget to handle it, I certainly wasn’t in the frame of mind to completely gut the space. However, a leak needed to be fixed, and ultimately, it made more sense to spend the money to make the room exactly what I wanted than it did to spend a slightly smaller amount of money to put a bandaid on the root problem.

The scope creep in this bathroom was REAL, y’all. What started out as a week-long project turned into a month-long extravaganza that ended up costing a lot more money than originally planned. My contractors had problems demolishing the existing tile (more on that later), my very detailed plan for the floor tiling was more than they bargained for (also more on that later), and my dedication to my design plan caused significant delays. However, this highlighted a fairly significant shift in my mindset. You see–I’m a NOTORIOUS people pleaser… To the extent that I usually sabotage my own equities to please other people. A past version of myself would have been passive about certain aspects of this renovation to avoid confrontation with the contractors (as silly as that sounds), but TODAY’S version of myself stood confidently in the design decisions that I planned. For that, I’m proud of myself (and not at all surprised that yet another renovation has highlighted a deeply introspective and positive shift in my character).

Additionally, this bathroom renovation was an exercise in iterative design and consistent conceptualization. I’m proud of the pre-planning that went into this space, but when things didn’t turn out quite as expected, I had to make quick decisions that felt right for the home. The challenge here? Making the bathroom feel both brand new and 90 years old at the exact same time. Why do I torture myself with these contradictions? Because it’s fun! *eye twitches*
MAINTAINING THE CHARACTER OF THE HOME AND PAYING RESPECT TO HISTORY

Toilet | Toilet Lever | Toilet Paper Holder | Bud Vase | Pedestal Sink

Bath Towel | Hand Towel | Towel Bar
AND THAT BRINGS US TO THIS TILE THAT I LOVE SO MUCH.
I’ve always loved the look of a custom marble floor, and I knew from the beginning that’s how I wanted to handle the tile in this bathroom (much to my contractor’s chagrin). There is something wildly authentic and genuine about a marble floor—particularly a marble floor with a custom pattern. It feels quintessentially traditional. Luxurious, yet approachable. Tailored in the most “me” way possible. From the beginning, I knew that I wanted to treat this floor in a way that felt both new and old… like it was freshly installed, but freshly installed in 1929, when this house was built. I’m proud to say that I think I’ve succeeded! I chatted with Emily about this tile plan pretty early in the process, and she agreed that there’s something super classic and timeless about a floor border! I used a basket weave tile for most of the floor, a black marble tile for the border, and a mini brick pattern for the outer edge.

Marble Baseboard | Subway Tile | Basket Weave Floor Tile | Mini Brick Floor Tile | Black Marble Border Tile
OK BUT GET INTO THIS MARBLE BASEBOARD AND PERFECT SUBWAY TILE MOMENT WITH ME, PLEASE. Ironically, the room is actually a bit smaller than it was previously! My contractor wasn’t able to remove all of the old tile from the walls, so we ended up having to install the new tile over the old tile. This was a tough decision to make, to be sure, but in hindsight, I actually like knowing that remnants of the old space still remain. As I mentioned in my introductory article about this remodel, I really did like the old tile, and there is something comforting about knowing that the original tile is now fossilized behind the new wall. Either that or I’m trying hard to come to grips with the fact that the bathroom is smaller than it was to begin with.

I turned to The Tile Shop to source all of the tile for this space, and I was immensely pleased with their wide selection (check me out on Instagram to see an in-depth video about my tile selection process–from a showroom walkthrough to tile unboxing)! All tile, grout, and caulking in this space are from The Tile Shop. A true one-stop-shop.

Despite the room being slightly smaller than it was before the remodel, I actually think that this beautiful pedestal sink from Kingston Brass makes the space feel larger! This vanity was actually the very first thing that I purchased after I closed on my home back in April 2020. Effectively, it became the lynchpin that held the design of the entire space together. The brass legs and marble top feel like they belong in the room, in this house, and in my life. Admittedly, the sink is a bit lower than I’d like it to be, but despite that, I love how the open space underneath makes the bathroom feel a bit more open and well-considered. I store all of my cleaning supplies and other rarely-used bathroom items in my hallway linen closet, so I’m not missing any vanity storage!

Faucet and Knobs | Under-Sink Plumbing Supply Kit | Hand Soap
I’ve used brass for all of the plumbing fixtures in this space–all of which are also from Kingston Brass! The classic nature of the polished brass really makes the space feel warm and luxe, and if you know me, you know I LOVE A BRASSY MOMENT (and that I use that catchphrase far too often). The vintage shape of the knobs, traditional form of the faucets, and classic typographic letterforms used on the fixtures all lend themselves perfectly to the age of the home and the perpetual vibe I strive for: classic, collected, and tailored. I carried the brass aesthetic into most of the accessories in the bathroom–including a switchplate, wall sconces, and a towel rod from Rejuvenation.

In the midst of planning how I’d style this bathroom, I had a random dream that I was living in early America. In this dream, I was living as a slave and trying to fight for my freedom. Frederick Douglass was a big part of that dream, for whatever cosmic reason. After I woke up, I was inspired to do a bit of research about Douglass. I learned that on top of escaping slavery and becoming a national leader in the abolitionist movement, he was the most photographed man of the 19th century. He wanted to ensure a humanizing and accurate portrayal of Black Americans during a pivotal time in American history.

According to John Stauffer, an African-American Studies professor at Harvard University, “the look of [Douglass’s] public persona was crucial to him because he wanted to enter into the public sphere with an equal voice and equal image and have the same rights as any other citizen.” Something feels fitting about displaying his portrait in the same space in which I look at myself every day, so I decided to put him on display here. I’m a deeply feeling person, and I tend to let feelings, dreams, and history dictate many of my personal design choices and philosophies.

If you’ve been following along with my home renovation, you’ll know that I have quite a loving relationship with the black doors throughout my house. I’ve maintained that color consistency here in the bathroom, and alongside the vintage glass doorknob, it feels right at home in this space. The door is painted Black Magic by Valspar, the walls in this space are painted Swiss Coffee by Benjamin Moore, and the trim and ceiling are painted Simply White by Benjamin Moore (the same color story used in every other room in my house so far), Additionally, the DIY nook next to the door maintains some consistency with the DIY headboard in my bedroom, which makes this bathroom feel much more conversational with other rooms in my house. Yay for consistent design and obsessive planning!
UNDERSCORING ROUTINE-BUILDING BEHAVIORS

SPEAKING OF THIS NOOK. I’m not going to lie… I’m proud of myself for this one.
I originally intended to use a medicine cabinet in this space, but sadly, the placement of the studs in the wall behind the vanity made those dreams quite impossible. Consequently, I had to rethink some things, because even though I don’t have tons of bathroom toiletries, I do need surface space for the things that I use every day. After much deliberation and mild stress, I decided that a small nook should do the trick.

I taught myself how to cut a hole in the wall, frame the nook, and drywall the space so that it looked as seamless as possible. The addition of the brass shelf (cut down from an old shelf I had laying around) and the brass rod give the nook the perfect amount of tailoring that makes it feel like an intentional and functional design detail. Is the craftsmanship perfect? Absolutely not! However, I’m proud of myself for crafting it on my own and making something that facilitates my daily pampering routine. This element also speaks to my DIY headboard solution in my bedroom. Consistent synergy for the win.

As far back as I can remember, I’ve been HEAVILY inspired by hospitality design. The intentional comfort, consistent branding, and bespoke design elements all work together to speak poetry to my little designer heart. When I think about my favorite hotel spaces, they often feature vintage details that make the space feel warm and lived-in. Since I wasn’t able to incorporate a medicine cabinet into the bathroom, I decided that a vintage mirror was the way to go to provide that warm touch. I scoured vintage stores and antique shops in search of the perfect mirror, and I finally stumbled across this beauty at Community Forklift in Maryland.


I promptly took her home (for $25?!), cleaned her up, and laid her against the wall in the newly-tiled bathroom. I’m a firm believer that visceral reactions should define how we approach design solutions, and let me tell you… I had the MOST visceral reaction to seeing this mirror in the room. The traditional lines were perfect, the detailing at the top of the mirror added just the right amount of character, and the dramatic height of the mirror felt appropriately proportional to the height of the ceiling. Upon close inspection and research, I learned that the mirror was made in Galax, Virginia in 1947, and it feels meaningful to add a vintage piece to the space after tearing out so much of its original character. She was mine and I was hers.

To add more surface space, I mounted this glass shelf from Rejuvenation onto the mirror itself. Mounting the shelf to the mirror–instead of on the wall below it–feels like an authentic and original touch that I don’t often see in bathrooms. And it just looks so cool, right!? I used a carbide-tipped drill bit to drill holes through the mirror so that I could mount the shelf to it, and voila! This was a…very…slow…process, but it was totally worth the time and patience it took. Another truly tailored detail that adds counter space where there wasn’t much of it previously. The shelf is perfect for lining up my daily grooming products, and I’m finding that I don’t miss a medicine cabinet at all! Huzzah!

Shower Fixtures | Shower Curtain (custom)
Ok. Let’s pivot to the real star of the show. Can you believe that my immensely talented boyfriend sewed this shower curtain by HAND?! I wanted a custom-length curtain that felt tailor-made for this space. I was inspired to mimic the pleating of the Everhem curtains I used in my bedroom makeover, so we made the shower curtain roughly the same height— but used this beautiful, velvety, sumptuous, handsome, luxurious, green fabric that finishes off the bathroom in the most perfectly custom way. The pleating adds the right amount of soft, visual texture to the room and the height of the curtain adds necessary color to an otherwise fairly neutral space. Tending to my nighttime routine is made much more comfortable with the addition of this curtain, and I think it really speaks to the positive power of incorporating meaningful, personal pieces into every room of your home.

I installed these simple fabric hooks on the backside of the curtain and used leftover curtain hoops from Everhem to hang them up! I’m not sure if you can buy these curtain hoops a-la-carte from Everhem, but here is something similar on Amazon!

I love how the softness of the curtain balances out some of the harder and colder elements in the bathroom. The marble surfaces, shiny brass components, and dark wood tones all feel more well-considered with the addition of the complimentary curtain. It actually feels like a feature wall–a focal point in the room that draws you in, makes you feel welcome, and begs you to touch it. I used a simple tension rod from Bed Bath and Beyond to hang the curtain as high as possible, which accentuates the height of the room and makes it feel more spacious than it actually is. Is anyone interested in my boyfriend making a guest appearance here on Emily’s blog to show you the nitty, gritty details about how he masterfully made this curtain? Let me know!


Dry Brush (similar) | Beard Wash | Candle
I made a game-time decision to add these two nooks into the shower, and I can’t believe I almost didn’t include them in this makeover. Gone are the days of a clunky, metal, wall-mounted shower caddy that gets rusty and dusty in a matter of weeks. These nooks provide more than enough space for me to store all of the shower things, and I love that they reflect the DIY nook I installed by the sink! We stan a good conversation between design elements.

Before and afters, anyone??
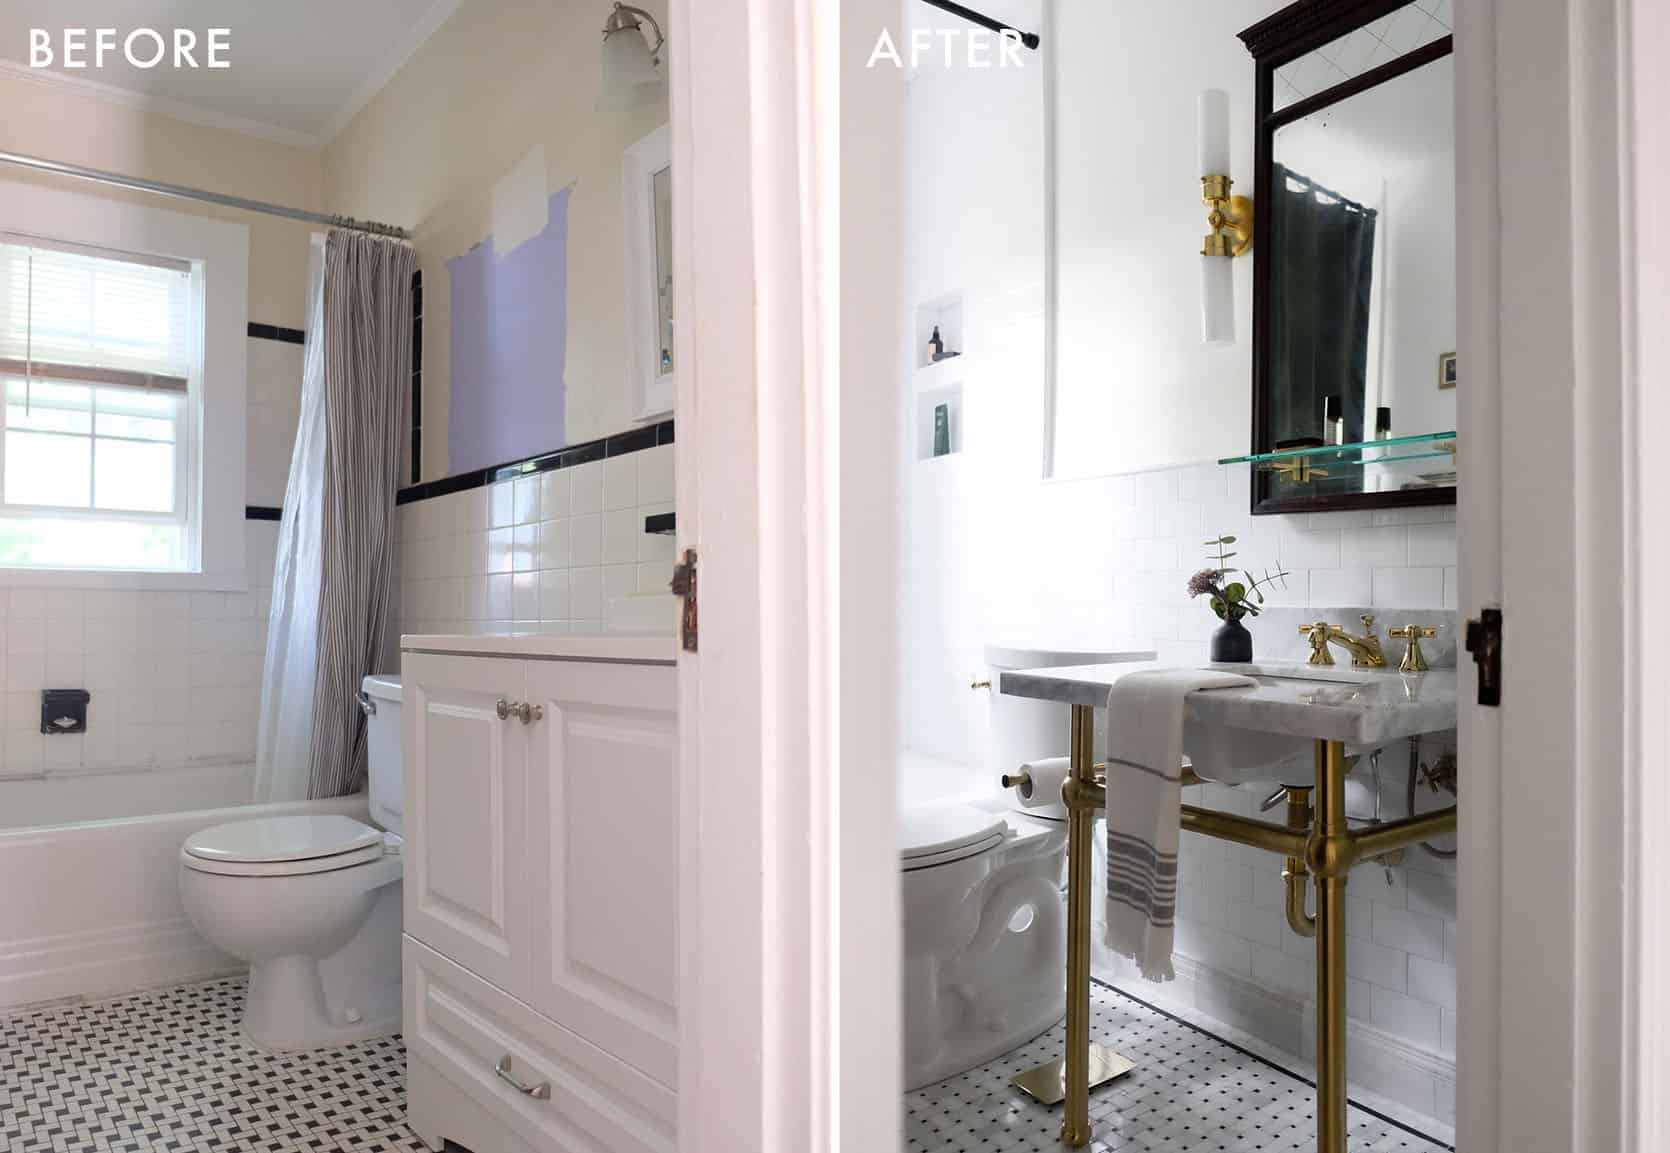


What a satisfying journey this has been–from problematic leak to perfectly tailored bathroom! What’s your favorite part of this makeover? Are you Interested in any dedicated DIY tutorials about any element in this bathroom? Let me knowww in the comments down belowww. In the meantime, I’m going to finally get that hole in my kitchen ceiling repaired.*
*If you’d like to follow along in real-time while I’m working on projects, be sure to follow me on Instagram!
*Design and Photos by Malcolm Simmons
The post Malcolm’s Bathroom Reveal – The Power Of Pivoting, Intentional Design, And A DIY That Will Have You Digging Into Your Walls appeared first on Emily Henderson.